Hey there, friends! Welcome back to part 2 of our super easy Photoshop tutorial on creating awesome 3D text effects. If you missed part 1, don’t worry! You can still follow along. Today, I’m going to show you how to use PSD templates to make your text look really cool. And guess what? I’ll be sharing some of my own Photoshop PSD files to help you get started. So let’s dive in and have some fun!
Getting Started with PSD Templates
Alright, so PSD templates are basically pre-made designs you can use in Photoshop. They save you tons of time because you don’t have to start from scratch. I’ve made some cool templates just for you, and we’ll use them to create awesome 3D text effects.
First, you need to download the PSD files I’ve shared. Open them up in Photoshop. If you don’t know how to open a PSD file, it’s super easy. Just go to File > Open and find the file on your computer. Click on it and it’ll open right up!
Understanding Layers
In Photoshop, everything works in layers. Think of layers like a stack of paper. Each piece of paper can have something different on it, and you can move them around without messing up the others. When you open my PSD file, you’ll see a bunch of layers on the right side of the screen.
Adding Your Text
Now, we’re going to add some text. Click on the Text tool (it looks like a big T). Then, click anywhere on the canvas and start typing your text. Make it something fun, like your name or a cool word. Once you’ve got your text, you can change the font, size, and color using the options at the top of the screen. Play around with it until you like how it looks.
Making It 3D
Here comes the fun part! We’re going to make your text 3D. Right-click on your text layer and choose “Blending Options.” A new window will pop up with lots of cool settings. Don’t get overwhelmed! We’ll go through it step-by-step.
- Bevel & Emboss: Check this box to add some depth to your text. You can mess around with the settings here to make it look just right. Try changing the size and depth until it looks 3D.
- Contour: This one is right under Bevel & Emboss. Check it too. It’ll make your 3D effect even cooler.
- Texture: This is optional, but if you want to add some texture to your text, check this box. You can choose from different textures to give your text a unique look.
Adding Shadows
Shadows can make your text look even more 3D. Still in the Blending Options window, find the “Drop Shadow” option. Check the box and play around with the distance, spread, and size until you get a shadow you like.
Using My PSD Templates
Now, if you’re feeling lazy or just want to see how it’s done, you can use my PSD templates. Open one of my PSD files, and you’ll see I’ve already done most of the work for you. All you need to do is change the text.
To change the text in my template, find the text layer in the Layers panel. It’ll usually have a big “T” icon next to it. Double-click on the “T” icon and type your own text. Boom! You’ve got a cool 3D text effect in no time.
Adding More Effects
If you want to get even fancier, you can add more effects. Here are a few ideas:
- Gradient Overlay: In the Blending Options, check the Gradient Overlay box. This will add a cool gradient to your text. You can choose different colors and angles.
- Stroke: This adds an outline to your text. Check the Stroke box and choose the color and size of your outline.
- Inner Shadow: This is like a shadow inside your text. Check the Inner Shadow box and mess with the settings to see what looks good.
Saving Your Work
Once you’re happy with your 3D text, it’s time to save it. Go to File > Save As and choose where you want to save your file. You can save it as a PSD if you want to keep all the layers and effects. If you want to share it with friends, save it as a JPEG or PNG.
Experiment and Have Fun
The best way to get better at Photoshop is to experiment. Try different fonts, colors, and effects. Don’t be afraid to make mistakes. Sometimes the best designs come from happy accidents.
Share Your Creations
I’d love to see what you come up with! Share your 3D text creations in the comments or on social media. Use the hashtag #Cool3DText so we can all see your awesome work.
Download My PSD Templates
As promised, here are the links to download my PSD templates. These will help you get started and give you a head start on creating amazing 3D text effects.
Download PSD Here
Conclusion
That’s it for part 2 of our Photoshop tutorial on creating cool 3D text effects. I hope you had fun and learned something new. Remember, practice makes perfect, so keep experimenting and trying new things. Photoshop is a powerful tool, and the more you use it, the better you’ll get.
Stay tuned for part 3, where we’ll dive even deeper into creating amazing designs with Photoshop. Thanks for hanging out with me, and happy designing!
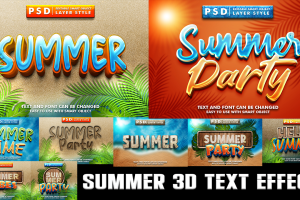
Featured Image Credit: Graphics Wonderland (Youtube Channel)