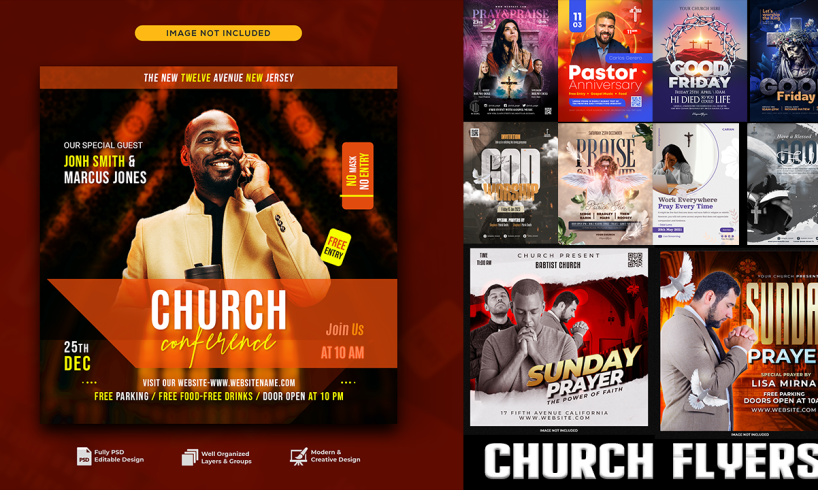
Hey everyone! So, you want to make some cool church flyers but don’t know where to start? Don’t worry, I’m here to help you out. We’re gonna learn how to design and edit church flyers using Photoshop. It’s gonna be fun and super easy. Plus, I’ll share some Photoshop PSD files to help you get started. Let’s jump right in!
Getting Started with Photoshop
First things first, you need Photoshop. If you don’t have it yet, you can get a free trial from Adobe’s website. Once you have it installed, open it up and let’s get ready to create some awesome flyers.
Step 1: Setting Up Your Canvas
Okay, so when you open Photoshop, you’ll see a screen with a bunch of options. You want to start by creating a new document. Here’s how:
- Click on “File” at the top left corner.
- Select “New” from the dropdown menu.
- A new window will pop up. Set the width to 8.5 inches and the height to 11 inches for a standard flyer size. You can also set the resolution to 300 pixels/inch to make sure it prints nicely.
- Click “Create”.
Now you have a blank canvas to work with.
Step 2: Adding a Background
A plain white background is kind of boring, right? Let’s add some color or a cool image.
- Click on the “Paint Bucket Tool” from the toolbar on the left (it looks like a paint bucket, duh).
- Pick a color you like from the color picker at the bottom of the toolbar.
- Click anywhere on the canvas to fill it with that color.
Or, if you want an image as your background:
- Go to “File” and select “Place Embedded”.
- Choose an image from your computer and click “Place”.
- Adjust the size of the image by dragging the corners and press Enter when you’re happy with it.
Step 3: Adding Text
Now, let’s add some text to your flyer. This could be the church name, event title, date, time, and so on.
- Click on the “Text Tool” (it looks like a T).
- Click anywhere on the canvas and start typing.
- You can change the font, size, and color from the options at the top.
Make sure your text is easy to read. You don’t want people squinting at your flyer trying to figure out what it says.
Step 4: Adding Images and Icons
Adding images and icons can make your flyer more interesting.
- Go to “File” and select “Place Embedded” again to add images.
- You can find free icons online or use shapes in Photoshop. To use shapes, click on the “Shape Tool” (it looks like a rectangle or a circle).
- Draw your shape and you can change its color from the options at the top.
Step 5: Arranging Elements
You want your flyer to look neat and organized, right? So, let’s arrange everything nicely.
- Click on the “Move Tool” (it looks like a cursor arrow) to move your text, images, and shapes around.
- Use the “Align” tools at the top to center your elements.
- Make sure there’s enough space between different parts so it doesn’t look cluttered.
Step 6: Adding Some Effects
Let’s add some effects to make your flyer pop!
- Right-click on a layer (like your text or an image) and select “Blending Options”.
- You can add shadows, glows, and other cool effects from here.
- Play around with the settings until you like what you see.
Step 7: Saving Your Work
All done? Awesome! Now you need to save your work so you can print it or share it online.
- Go to “File” and select “Save As”.
- Choose where you want to save it on your computer and give it a name.
- For printing, save it as a PDF. For online sharing, save it as a JPEG or PNG.
Sharing PSD Files
To make things even easier, I’m sharing some Photoshop PSD files that you can download and use. These files have some pre-made designs, so you can just edit the text and images to fit your needs. You can download them from the link below.
Download PSD Files
Tips and Tricks
Here are some extra tips to help you out:
- Keep it simple: Don’t overload your flyer with too much text or too many images. Simple is better.
- Use high-quality images: Blurry images don’t look good. Make sure your pictures are clear and high-resolution.
- Match your colors: Use colors that go well together. You can find color palettes online if you need help.
- Proofread: Check your flyer for any spelling or grammar mistakes. It’s always good to have someone else look at it too.
Final Thoughts
And there you have it! You just learned how to design and edit church flyers in Photoshop. It might seem a bit tricky at first, but with a little practice, you’ll get the hang of it. Have fun creating and don’t be afraid to experiment with different designs. Remember, the more you practice, the better you’ll get.
I hope this guide was helpful. If you have any questions or need more tips, feel free to ask. Happy designing!
Alright, that’s all for now. Thanks for reading, and good luck with your flyers!
Featured Image Credit: Graphics Wonderland (Youtube Channel)


